Ever wondered how to make the most out of your food waste?
As a vegan diet is rich in fruit and vegetables, we often have a lot of waste in the form of peelings, off-cuts, seeds and pulp.
But did you know that this so called “waste” could be potential nourishment for your garden?
Composting is a great, eco-friendly way to wisely use our bio-degradable waste as nutrient rich content for our garden’s soil, instead of sending it to a landfill.
Every garden should really have a composting system, and it is simple to get one started.
Here is my 3 steps guide to making your own vegan compost:
Step 1: Make Your Eco-Friendly Vegan Compost Bin
While you might be tempted to go out and purchase a compost bin, you should know that it’s easy and cheaper to make your own, and you can use recycled materials.
A good place to start is to determine how much waste your household produces.
A single person house will create a very small amount compared to my four-person with two kids – who seems to eat everything not tied down – household!
This, together with the space you have available, will help you decide on the size and type of compost bin that’s right for you.
Here are a few DIY options:
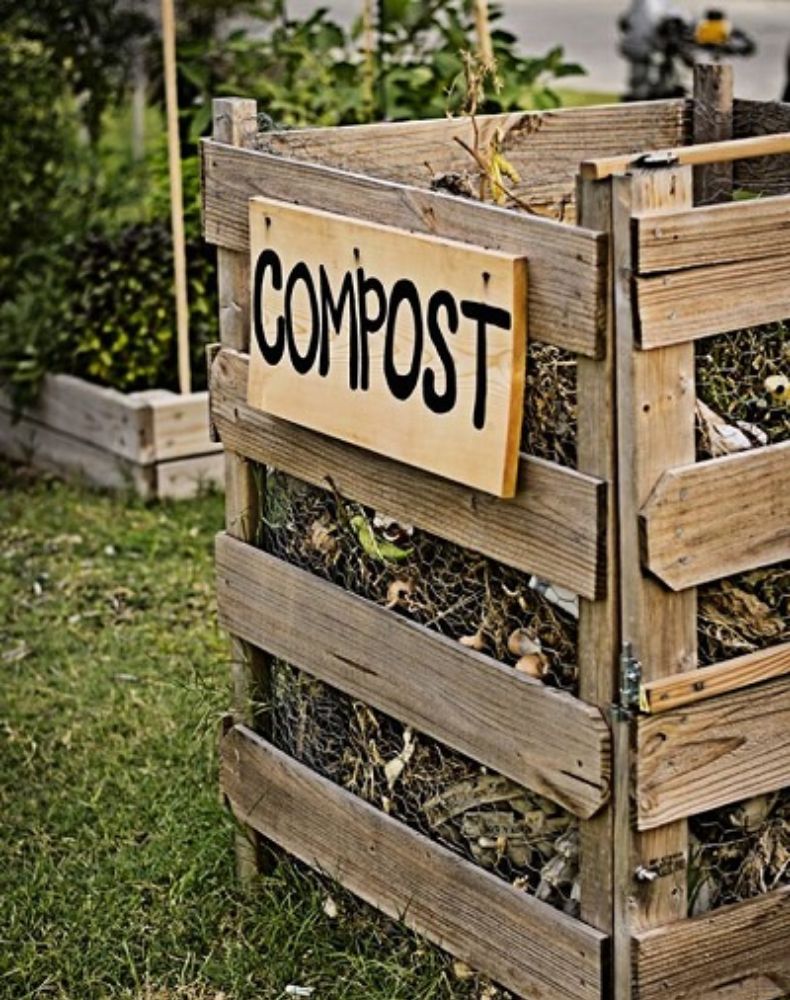
1-Wooden Pallets Compost Bin:
You can create a very simple, but large compost bin by recycling 4-5 wooden pallets.
Simply place one pallet directly onto the ground – this pallet allows for airflow under the stack, then attach a pallet to the back and sides with long screws.
Attach a front pallet with screws or nuts/bolts that are easy to undo – that way you can take the entire front pallet off for easy access when the compost is ready to be placed onto your garden beds.
If you don’t have any wooden pallets laying around waiting to be recycled, check with your local garden/ hardware/ building supplier – they will probably be more than happy to have you rid of their old unusable pallets by taking them off their hands.
2-Tires Compost Bin:
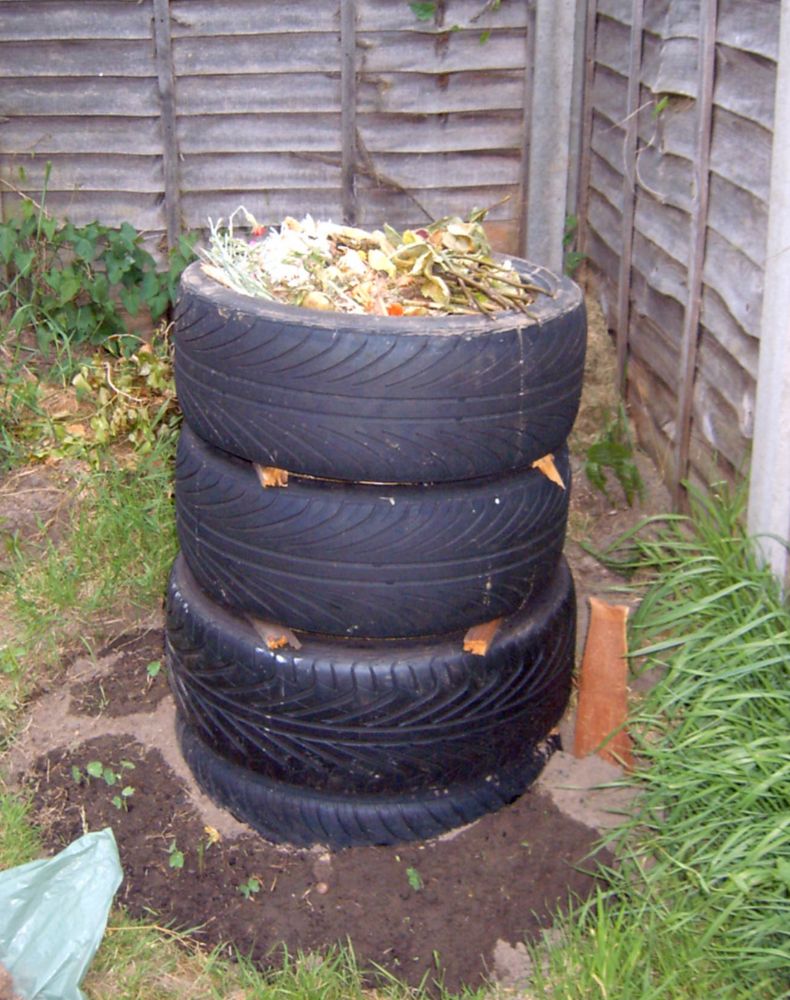
Old, unusable car or SUV tires stacked on top of one another are a very quick option to recycle and create your compost bin.
You will be surprised at how much you can fit into a stack of five large tires. As a bonus tires retain heat making the compost work down faster.
Just knock over the tires when it is ready and make sure you get all of the goodness out of the inside rims!
3-The Stylish, PVC, Compost Bin:
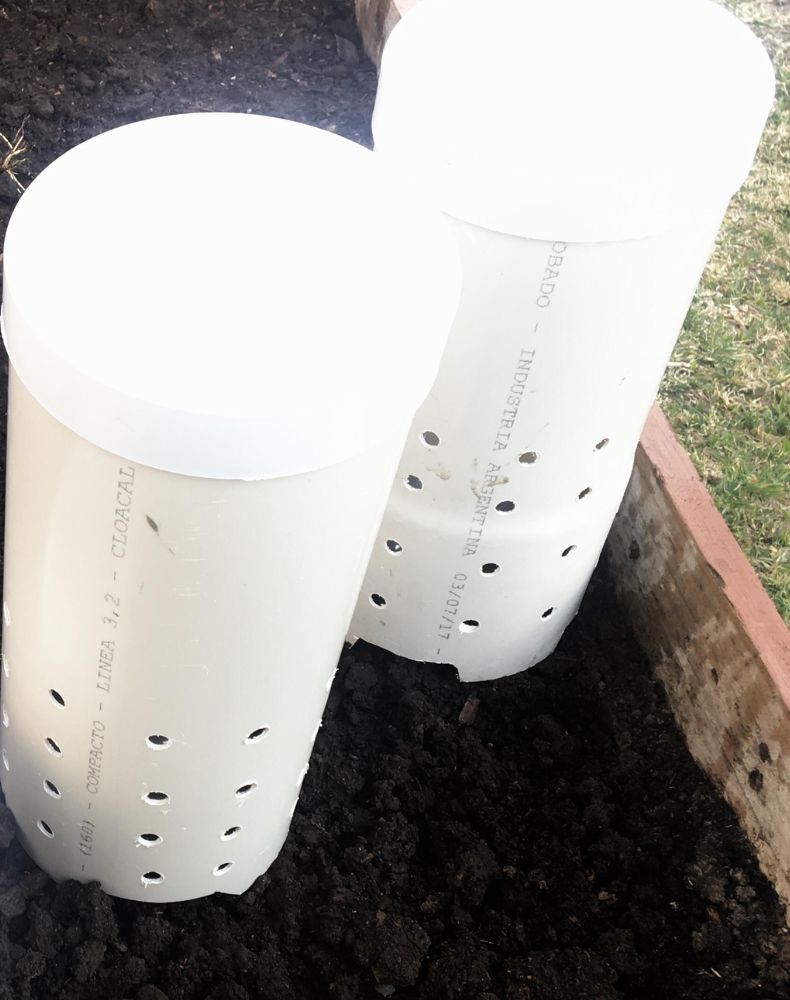
I once made six mini compost bins for a single older relative who wanted to compost but didn’t want anything unattractive in her meticulously neat garden.
I took a trip to the hardware store and purchased three meter lengths of the widest PVC pipe that I could find (in the plumbing section).
I also got six caps to fit the pipe width cute brass kitchen cupboard door handles. I cut the three pipes in half to make six 50cm pieces.
Then with a wide drill bit and the drill on low speed (too fast and you will crack the pipe) I drilled through the pipe about 12-14 times evenly around the pipe.
These holes allow the worms in the garden bed to crawl in to get the food and crawl out to poop!
Make sure you file the rough edges around the holes (in and out) so the worms won’t get bruised while passing.
Fit a brass door handle onto each of the pipe caps so that you can open the top off the pipe to put in the food scraps.
Bury the mini compost bins into the garden beds evenly distributed, and leave enough above the ground so that you can just see the cap with the pretty handle.
Then whenever you have a collection of kitchen scraps, simply lift the lids and let the worms do their work.
Step 2: Let’s Get Composting
Now you’ve made your compost bin and you are ready to start making your compost.
The trick with composting is to treat it like making a layer cake.
You need the right mix of waste with not too much of one thing as it can throw out the balance.
I use the thirds rule:
- One third brown (like dried leaves, small sticks, straw).
- One third green (lawn cuttings and weeds straight from your garden, clippings from your garden and veggies that have finished producing).
- And the final third made up of vegan scraps from your kitchen (peels, pulp from juicing, hair clippings, and coffee grounds, the worms LOVE them!).
You can also compost paper, but be sure to remove any plastic (like the ones in envelopes), toilet paper rolls and non-glossy printed paper.
A shredder comes in handy here or you can give the kids the fun job of tearing it up into little pieces.
When the compost is ready, it will be dark, moist and crumbly with no sour smell.
Step 3: Looking After Your Compost
Keep the compost moist but not wet as this makes the compost smelly and slimy.
I throw a bucket or two of water every week when I take out the kitchen scraps and rinse out the bin.
Water a bit more when the weather is warm and hardly at all when it is cold.
If you lay some old carpet or cardboard on top of the pile, it helps to keep it moist and warm. The warmer the pile is the quicker it will break down.
If you have any rescued chickens in your yard, by all means add their old straw that you clean out from their house in the compost.
It is an excellent source of nitrogen but make sure it composts for a while as it can burn your plants if put straight onto your garden.
Note that this won’t be a problem for us vegans, but never ever add any animal bones, any dairy products or cat/dog waste!
These products attract rodents and will make your compost bin smell horrible.
You may also like:
- Red Falafel Balls (Gluten Free)
- What Do Vegans Put in Their Sandwiches?
- The Easiest Vegan Pancakes
- Vegan Chocolate-Date Balls
- The 8 Best Easy Vegan Cookbooks Of 2022
- Vegan Tortilla De Patatas (Spanish Omelette)
- What To Look For When Buying a Food Processor?
- Plant Protein Patties
- Fruity Chia-Seed Pudding with a Hint of Basil
- Low fat Vegan Breaded Cauliflower Chunks
- The 17 Best Vegan Documentaries On Netflix
- 7 Ways To Find A Vegan Job?
Your Compost Is Ready! Time To Apply It
After following my 3 steps guide, you are now ready to enjoy your vegan compost.
The compost should now have a rich brown colour and a pleasant earthy smell.
You can put it on top of your beds and let the worms drag it down or you can dig the compost in, gently, into the garden beds.
P.S. Sometimes you will see little plants growing up in your compost pile such as tomatoes, pumpkins and zucchinis, from the seeds that you have thrown out in your kitchen scraps.
Don’t discard them! They could have great potential for becoming free vegan food that you can grow in your garden.
Gently transplant them to your garden beds where you can nurture them with love and attention.
Happy vegan gardening!